Tuesday, May 31, 2016

5/30 Lesson + Horsey Products

I have no media from lesson, so the media in this post is from various days in the last week.

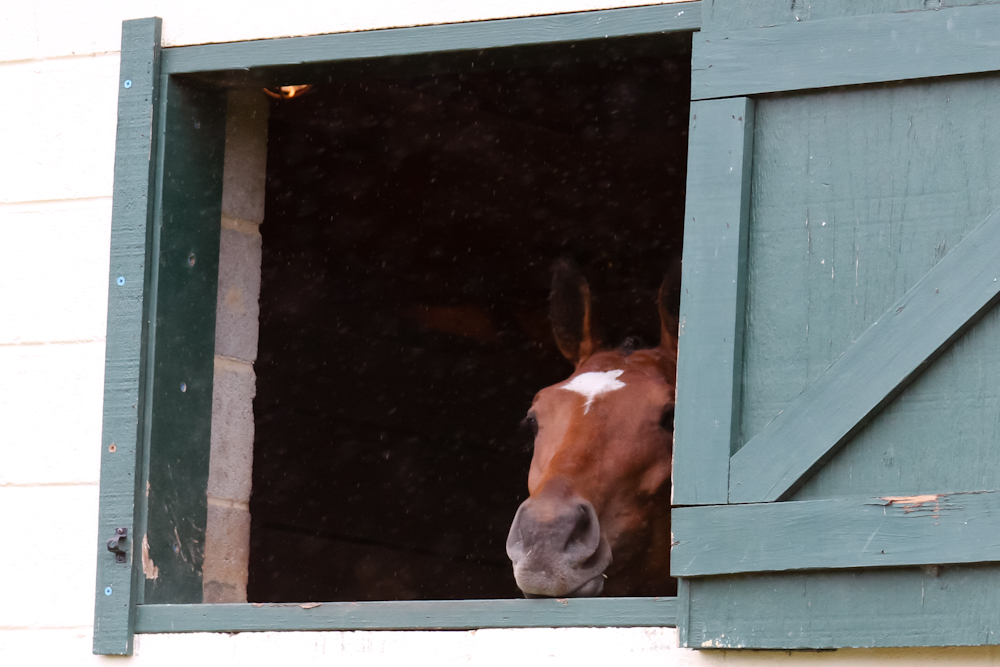
I worked from home from the barn last Wednesday (our barn is awesome and has excellent wifi). I could see Penn's stall from where I was sitting in the lounge, which enabled me to run away and snag a picture of him trying to sleep. BTW, doing my working remote day from the barn? Incredible. I took Penn for a spin at lunch and was home for dinner!

Hawk and I hauled to Trainer's house for lesson on Monday. Its been super hot here, and today was only slightly better than the weekend. (I know, 88 degrees is not hot to a lot of my southern readers, but hey, it's hot for us!)

Trainer and I caught up on the last horse show, Penn's abscess remnant (something I may eventually talk about on here, but I really don't have enough information right now- the only thing that matters is Penn is sound and comfortable), and issues that we need to work on. I mentioned that both judges nailed me for head tilt and a lack of balance in the canter- mostly in the corners where I either bounce him off the corner or bury him in it. I wanted to work on my halts, because he's generally fairly square, but I want to make those halts super square because of the extra halt in 1-3.

We went on a big group trail ride Friday afternoon. Penn is styling how to trail ride safely, and in style.
#don'tshootme #psofsweden

Another thing I've been playing with is a regular snaffle bridle with a flash. Trainer suggested it in our last lesson, but Penn immediately went lame and I never got to test it before our last show. I've been borrowing a regular noseband from BO since my only black one is in bad shape from a flash dragging it down Mikey's nose and is no longer usable with a flash. She suggested it because while the Micklem is great, nothing beats the steadiness of an actual cheek piece, and steadiness is something we've been lacking. I had mixed feelings about the regular noseband (it was a different feel to both of us), but he definitely went well in it, and he went REALLY well in it at lesson.

Close up of the pretty.

Trainer had me trot on, and then immediately pointed out that I'm shoving his haunches in. She had me play with a balance between how I use my legs (like keeping a soccer ball straight and even in front of me). Tracking left, she also had me post on the wrong diagonal to help my timing with the right hind. I found an interesting rhythm of bouncing him off the inside leg and supporting with the outside, and a lot of our issues cleared up (ie, head tilting, falling in the corners, unsteady steps). I spent some time just going around the ring and doing circles to figure out how to get Penn balanced properly without shoving Penn's hindquarters around.

Keeping that in mind, we did some lengthenings on the long wall, came back around and did some leg yields out on the next long wall. If Penn got fussy, I would sit the trot and kick him on using that same rhythm, just louder. The lengthenings are very small and basic because we're having this straightness issue, and he just isn't strong enough yet once he's straight. Bringing him back from the lengthening is easy- half halting through my core and shoulders, and he lifts right up and shortens his step. Very cool.

Trail ride ear shot!

We changed up the trot work to the left- leg yield into halt, trot off promptly, leg yield again immediately. This, ahem, pointed out how much I over use my left rein and made it click to me that if I bear down on it, Penn isn't going to let his left hind follow through into the halt. Penn did not like this exercise and tried to back out of the halt and threaten me when I asked him to move off. Eventually we got it a bit better, and it's something that will work for me when I'm alone and without a ground person. If I'm doing it wrong, he'll swing his butt and lose his straightness and not be able to trot off promptly. It's very clear when I'm wrong and when I'm right. I also ended up swapping to sit trot for most of this work- Penn just needed the extra help and it let me get after his fussy moments quicker.

We spent a long time working the trot. Penn was fabulous. Light, bouncy, through, and VERY steady in the bridle. I need to figure out how to make that steadiness happen at this weekend's recognized show without working the trot for a half hour plus. Keeping him balanced between the leg helped a lot, but I'll have to work the other trot work in too.

Nomming grass from the hay field.

As for the canter, each lead has it's own theory:

Canter right:
  • Start in trot on a circle, do haunches in on the circle.
  • Canter right lead, still in haunches in.
  • Transition to trot, still in haunches in.
  • Repeat until comfortable.
  • Take it large and repeat the transitions on the straight lines.
  • Eventually you want to be able to do 2-3 transitions to canter on one long wall.
  • The short side of the arena really screws us up. I have incredible difficulty getting him back properly after cantering the short side because I lose the left hind or I overdrive it to the inside instead of bending around the corner.

Canter left:
  • Leg yield right in trot from centerline to quarterline or quarterline to wall.
  • Straighten, canter left, continue leg yield right.
  • Transitioning out of the canter, leg yield into trot.
  • The left lead transitions are all about keeping Penn busy, active, and engaged.

This lesson mostly focused on the failures of the left hind and it's unwillingness to keep up, as well as my enabling it to happen.

Oh yea, I had her look at my saddle's fit because I've begun to suspect that it doesn't fit Penn anymore... and she agrees. So I'll be ordering another Stubben 1894 (I like this saddle a lot and the shape is still good for Penn) and selling mine... I believe mine is a 29cm tree, I'll order the 30cm... good thing I logged which tree is in it when I posted about it in November!
_______________________________________________________________

Alright, horsey product time!

Pretty. Yes? Please?

I'm shopping for a new snaffle bridle. My only black snaffle is in use as a double bridle via bradoon hanger, and while I don't need it to act as such, its noseband is not in good shape. Using a flash attachment (that I can't find), I managed to pull the top of the noseband down for long enough that it has trouble staying up on the nose where it should. The bridle is also too big for Penn. Cue shopping!

I'm looking at the Flexible Fit Equestrian bridles- I only want a headpiece, checks, and noseband which totals to $159 and change (plus $35 in shipping that I may be able to split with BO, plus some unknown amount from customs). I looked into buying just a noseband from elsewhere, like at Bit of Britain, and just that totals $90 before tax and shipping. And I'm just not excited about that noseband. If I'm going to spend over $100, I may as well (hopefully) love what I get!
When put together in the build a bridle, it's a bit less expensive than buying each piece on it's own. I'm not fond of the crank, and there is an alternative, but I don't like it as much. They're almost identical, but I can't put a finger on why I don't like it.

I'm currently going back and forth with reps from the company about the proper sizing (hint, I've measured Penn twice now), and I think their bridles run a little small when compared to American sized bridles (the company is in Australia).

Anyone have experience with these bridles?
___________________________________________


Anyone have experience with this product, or this type of product? I found a super scary COTH chain that gave some horrifying allergic reactions to either this product, or ones like it. I think I'm going to return the spot treatment to Tractor Supply, I'm just too afraid to use it. The chain is old (from 2009) but even the packaging warned about allergic reactions, that may happen without warning, even after successfully using the product, and may increase in chance with continued use. I wanted it mostly for ticks, but I think I'll just have the vet give Penn a Lyme vaccine instead.

Tuesday, May 24, 2016

5/21-22/2016 - Penn's First Recognized Show!

This is a long post (mostly because it has a ton of pictures and some video). Sorry!

Successful weekend!

Penn took his good old sweet time, but his abscess issue cleared up mid-week as he became sound on Wednesday. I decided to take him to the recognized show this weekend even though we hadn't practiced at all- if he didn't seem up to it, I could always scratch and he could just get a big whiff of a bigger horse show atmosphere. May as well get something for my money!

Plus, we had to pick up Guinness so we could meet and hang out with Austen all weekend! (which was completely awesome!)

Picking up Guinness!
I got to meet the magnificent duo of Austen & Guinness!

Friday's weather was perfect traveling weather. Sunshine and warm. I took Penn for a spin in the warm up ring where he proceeded to be an excellent and on task baby horse (he had a couple very baby horse moments going from stabling to warm up)! Too bad the wonderful weather and on task horse were not going to stay!

Settled in for the night. I love these stalls- they all have windows! Penn really liked that. I'll have to remember to request this barn (or any of the non-shedrow barns) next time we're back at this venue. For my future reference: Barn 4 is where we stayed.

It started raining Friday night, and I don't think it ever really quit all weekend. It was always at least misting, if not down pouring. To make matters worse, the temps stayed in the 50s all weekend.

I had a little free time Saturday morning, so I took Penn out for some grass so he'd settle in his stall.

Grazing Saturday morning in his new Mio sheet.

Grazing time ended when the rain stopped misting and started really coming down. I popped in some braids when we got back to his stall.

Freshly done braids.
________________________________________________

1st Saturday Test: First 3, AA, GAIG Qualifying

Our first test of the weekend was 1-3, which threw me for a loop because I expected it to be 1-2. Penn was good in warm up- I made him go through all the puddles (which were everywhere) and he was very impressed by the footing- he was taking big slow suspended trot steps. I didn't warm him up like I should have- I was concerned about stressing him, worried about him slipping, and worried about tiring him out... so I let him get away with a lot and never found the right connection, which didn't help me in our test.

Leg yield and the start of the head tilt nonsense that plagued us all weekend.
Very up and down canter into the lengthening.
Loss of control of the shoulders as he gave F and/or a puddle a hard look.

I never got my head in the game for this test. I rode poorly. I forget that Penn is still a baby horse when it comes to the show ring, and he got off task and I never corrected him. There were so many distractions for me: the rain, it being my first time back in the USDF/USEF show ring since 2014, and my flipping coat tail is too long and I kept sitting on it which pulled my jacket around. My ring geometry was atrocious, our normally excellent leg yields had leading haunches, I couldn't find right bend or get Penn back on task to save my life. It was just bad. Penn had zero interest in the free walk or stretchy trot and we left a ton of points on the table.


58.971% - 5th out of 9 (originally 13, but there were 4 scratches), not a GAIG Championship qualifying score.

Totally deserved that score. Just have to chalk it up to both horse and rider being distracted.
________________________________________________

We had about an hour between tests, so I took Penn back to the barn to decompress and to attempt to get my brain going again. Husband used the break as a chance to get some pictures of Penn with his head out of his stall:

I love this picture. Head resting, eyes closing.
Peeking out at the rain.

Eventually we made our way back down to the soppy warm up and show arena.

3 of the show rings in the misty rain. There was a 4th off to the right.
________________________________________________

2nd Saturday Test: First 2, AA, CBLM Qualifying

I took Penn back down to warm up and attempted to get myself on task and working. It kind of worked and I had much better luck riding 1-2, which I think both Penn and I prefer.

I joined my local GMO group the week before this show when I found out Region 1 does a region specific championships- the Colonel Bengt Ljungquist Memorial Championships (CBLM Championships). In order to qualify at First Level, you have to be a member of your local GMO and score a 62%+ in 1-2 at a qualifying show. The percent differs for each level, just like GAIG Regional Championships. This championship further splits First Level riders- Section A riders cannot have shown at 3rd level or above at a recognized show. Section B riders are those that don't qualify for Section A. Oops, I guess I'm Section B. I'm still not clear if they lump AA and Open together, so I'm not looking forward to that if it's Section B, AA & Open competing together. I'm not sure I want to go to CBLM championships, but I paid dues to the local GMO so I can decide later (plus I only planned on riding in two classes that are qualifiers this summer, so I needed that membership ASAP to not miss out on a possible score!).

Lengthening
Canter across the diagonal to trot at X.
Yet another loss of control of the shoulders as he looks at a puddle. Or something. This is my life in canter once we get into the show ring.

Not many comments for this test, I was just happy it went better than the first! I think my dad had some technical issues because all of the right lead canter work is missing from the video and I had to piece the test back together from 3 different video segments.


62.500% - 3rd out of 11 (originally 13, but there were 2 scratches), a CBLM Championship qualifying score!

I was super happy to get my CBLM Championship qualifying score- no wasted time there!
________________________________________________

At Saturday evening's night check, Penn and Guinness were watching Horse TV.

Saturday afternoon was for watching Austen's ride (which was exciting and she'll have to tell you about it), and then setting everything up for Sunday.

While it may have misted for most of the day Saturday, it poured all night long and kept pouring throughout the morning. Luckily, it slowed down to misting for my last ride of the weekend! (It was really Austen's magical raincoat that stopped the rain for my ride... but not hers... thanks!)

A ton of riders had scratched on Saturday, and the trend continued Sunday. The rings were even sloppier. Coming from event land, I didn't think too poorly of the footing- for as sloppy as it was, horses weren't slipping when they stepped on the surfaces, and it wasn't shoe sucking mud either. By the end of the day, the show organizers were trying to get riders to move up their ride times so everyone could get in the ring and get home because no one really wanted to play "day at the horse show" anymore!

Even sloppier warm up area. He had such nice suspension in here though!
________________________________________________

Sunday Test: First 3, AA, GAIG Qualifying

I came to this test's warm up with my head on right and Stephen's warm up routine in mind. Establish the bend each direction using leg yields out, some figure 8's with trot/walk/trot transitions, run through a couple leg yields from 1-2, then the 1-3 zig zag a couple times. Work the trot/halt/trot a little. Canter became more of "keep cantering!" as Penn didn't want to continue cantering and I had to tap him with the whip to remind him to keep going. Penn started picking up the wrong lead just before we went into the ring. Eeek! I did the right to left simple change once.

I ran the idea of sitting the trot past Austen, who agreed it would probably be better (she noted after that I probably could have posted the lengthenings... oops). I also kept my whip so I could remind Penn about keeping the canter (I've only used the whip in the ring once or twice... I know I tapped Penn at least 3 times to keep moving). Off to the test!

Halt at X between 10m circle madness. Look how straight!!! Too bad this halt wasn't actually square!
He left his right hind behind...
... and brought it forward when I was being confusing (yet again!) as I asked for trot. (this shot is a video screenshot to prove square happened late)
More head tilting nonsense in the 10m circle left.
LOVELY one loop though. The judge didn't seem to agree as it only got a 6.5.
The second step of trot in the simple change. I just liked how the right hind stepped up.
Air time in the lengthening canter!
More lengthening canter.
The second shallow loop.
Lengthening trot.
Lengthening trot again.
Final halt of the weekend!

I kept my head in this test and had to really work for it. Penn just wasn't keen on the footing. He didn't like the splashing and wasn't sure of himself, so I ended up doing a lot more supporting than I've ever done for him in public. But we can chalk that up to him being a baby horse and me not giving him enough experience on poor footing.

I need to equally support Penn's hind legs in the trot-halt-trot. He's very capable of square halts and I gave away points in this test. He squared up after I added my leg back, then moved on to trot! I also have to stop the halt/salute mentality. I spent time fiddling with my reins again! I also completely forgot where I was going when I picked up the right lead canter. The 15m circle right at C was poorly placed because I simply forgot about it when I was trying to make Penn pick up the correct lead! I loved the canter one loops though- he really stood up and balanced.


62.206% - 4th out of 7 (originally 9, but there were 2 scratches), a GAIG Championship qualifying score!
________________________________________________

Even though the 1-3 Saturday judge gave us a lower score (totally deserved), I much preferred her judging to the other judge I rode for (1-2 Saturday and 1-3 Sunday). The first judge varied her scores, where the second one became a 6'er. Almost everything was between a 6 and 7 in both of the tests I rode for her, and I thought the Sunday test went better than the Saturday. She wasn't nailing me as hard for mistakes I think, but she also wasn't giving the extra points. She comes to my area often for clinics, but I still don't really have any desire to lesson with her. Maybe I should since she's a judge.

Penn got some bling this weekend too:

PS of Sweden browband, passed from Emma to Austen to me- it fits my bridle and looks incredible on Penn!
Thanks Emma/Austen!
Edit: Thanks SB too! I didn't realize it started with you!

And I didn't bother cleaning my tack before my rides... I needed to clean it after so I could put it away!

The footing was a bit... sloppy.
Girth, boots, saddle, breeches (!!!!!), horse all looked like this. Penn even managed to get sand on his hindquarters and up my back! Also, I need help cleaning my white breeches... I've washed them 3 times now and they still have sand stains.

I watched Austen's rides Sunday afternoon (she totally rocked them and I'll let her tell you about it), and hung out with the best husky dogs ever, Sonka and Lyra. Husband liked them, and he's not a dog person. Mostly because these two are very cat like! I quote: "Huskies are my kind of dog. They're cat-dogs. I'd like one."

Taking Guinness home. I may have tried to take Sonka home with me after dropping Guinness off. I love him!

Even though I botched our first test of the weekend, we still got the qualifying scores for GAIG Championships and CBLM Championships that I came for. I couldn't have gotten two scores for GAIG at this show anyway, even if they were both qualifying scores (silly rules about how it has to be at 2 different shows). I'm super pleased with Penn- I've never ridden him in muck like that and he's never been at a show this big. He had baby horse moments, but seemed super proud of himself at the end of the day Sunday. We got some experience, so now we're going to work on making those scores a bit better for next time!

Monday, May 16, 2016

Braiding How To: Sew-in and a Long Mane Solution

When I went to the barn Sunday, I popped a couple braids in Penn's mane and took some pictures. I'd need another person there with me to video, but I uploaded a ridiculous number of pictures so hopefully it's enough for everyone else to get started! Unfortunately nothing of the forelock, I'd really need someone to video it. I'll try to describe what I do though.

Old T-84 blade, Smart Tails rake, waxed thread, sewing needle, scissors, spacing comb, hair clip (not pictured: pulling comb, seam ripper).

First, let's go over what I use to prep manes:
  1. Pulling comb (not pictured). I don't think anything beats a pulled mane. It can be done without upsetting the horse. When you pull, don't take too much hair at once and split up the mane over a number of days (if it's so thick or long that you can't get it done in a reasonable time). Also, pull it every month at least (depending how fast it grows)- you'll end up pulling out less hair each time, so it gets done faster, which means less time for the horse to get upset, which means happier mane pulling sessions, for both you and your horse.
  2. If you're not into pulled manes or can't pull them, PLEASE DO NOT SCISSOR THEM. That is probably the worst thing you can do if you want to braid. Use my next two options instead:
    • Smart Tails or Smart Manes rake (the only difference between the two is that the mane comb is wider). If your mane is too thick, take the rake to it. Take the mane over to the wrong side of her, comb it with the rake until you reach a thinness you like, then flip it back over (this essentially shortens the underside hairs). I did it without combing over to the wrong side and was disappointed- the short hairs I created ended up on top and became difficult to braid in later. This is an excellent video of how to do it, and then a way to use the rake to shorten the mane after thinning. I never found it effective to shorten the mane with the rake though (it doesn't look like the lady in the video found it effective either).
    • An old T-84 clipper blade. I just learned a trick with that to shorten the mane- act like you want to pull it (take hair, tease the short stuff back) then use the blade in a downwards motion to cut the hairs on an angle. The hair ends up looking more natural instead of the blunt scissor look, and you don't have to rip any hair out.
I bought the Smart Tails rake to "pull" my last horse's tail. He had some weird longer, but not full length, hairs near the top of his tail that didn't move with the rest of it. I really like the neat look that a pulled tail gives. I refuse to pull the tail, and I found the rake a very nice alternative. It also worked in cleaning up Penn's stupid short dock hairs that insisted on growing straight out.

The other items in my braid kit (well the kit is much bigger, but these are the ones that see the most use):
  1. Waxed thread. Specifically this waxed thread. I've found that all waxed threads are not created equal- some are more waxy than others. I prefer the brand Schneider's sells.
  2. Sewing needle. I walked into Jo-Ann Fabrics and bought a couple sewing needles with eyes big enough for the wax thread. I only use metal, I hate plastic. I find the plastic needles are too thick to push it through super tight braids. Be careful, they are sharp! I've stabbed myself many times. You'd think I'd learn!
  3. Scissors. Just make sure they're sharp enough to cut thread or yarn. I suppose you could use safety scissors, but I don't. I actually found these super sharp pointy ones useful for cutting out the hunter braids I did- just slide the tip under the yarn and it split with little pressure, not risking the mane at all.
  4. Braid Aid Comb. I don't know where I got mine from, but you can order one from Schneider's with your waxed thread. I use it to space braids so each one ends up exactly the same width (within reason, more on that below). It's also super helpful in taking out braids that are thin or super tight.
  5. Hair clip. I prefer the clips with "jaws."
  6. Seam ripper. Make sure it's sharp, and replace it when it stops being sharp.
  7. Spray and Braid or Quick Braid or water. Any work, but I prefer Spray and Braid. Anything that wets the mane (besides show sheen or a detangler!)


Alright, on to the braiding (shown in an obscene number of pictures)! I like dirty manes (but not as dirty as Penn's mane is in these pictures!), and make sure there is NO detangler or any conditioner in the mane.

1. Measure out the width of the braid using the braid aid comb. For schooling shows, I do 3 widths of the comb. Recognized shows gets two widths. The hunter braids get 3 teeth to one width, depending on mane thickness. Take less hair if you have a thicker mane, more hair if you have a thinner mane. I don't recommend more than 3 widths of the comb.
2. Braid down. Keep the braid as tight as you can, pulling the braid down close to the neck as you braid (not out towards you). After braiding as far down as you can, stab your needle through the braid.
3. Pinch the tail of the braid and the tail of your thread in your pointer finger and thumb. Tie off the braid using a slip knot.
4. Pull the slip knot down below where you stabbed through the braid. I picked this up after pulling my knot out in overzealous attempts at tightening the braid when tying it up and then having to start over.
5. Stab up through the base of the braid, as close to the crest as you can. Make sure you come out between the right and left strands at the start of the braid- you don't one to split one of the starting strands.
6. Pull the knot up to the base of the braid. See if you can get the tail of the braid to hide in the fold you just created. Don't panic if you can't, I can help you minimize it in the next few steps (encourage the tail off to the left if it's poking out of one side).
7. Stab the needle down through the tip of the braid. Don't stab too far away from the tip!
8. Push the needle back up through the base of the braid where you did the first time. Encourage the loop to be off to the right.
9. Pull the thread up and TIGHT. You now have an estimate of the final nub size.
10. Come back around and stab the needle through the braid where you stabbed the tip before, encourage the thread off to the left this time, and pull tight. If you have a tail sticking out, catch it in this loop so it sticks straight out in a horrible, awful manner.
11. Come back around to the right and go through just the base of the braid at the crest- don't stab the braid itself. Pull tight.
12. Come back around to the left again. If your tail has been misbehaving, make sure you don't grab it in this loop. Encourage it to fold back on itself and encourage the thread loop to lay right next to first loop you put to the left.
13. Pinch the braid as hard as you can to squash it to the crest. Do not crush it down! You'll make the braid stick out. As you're pinching it, stab the needle straight down through the braid to help encourage it to keep the squash and not unfold at all.
14. Finish up by stabbing straight through the middle.
15. Cut off the thread near the braid. No knots necessary!

Whew! That was a lot of pictures. Anyway, I always do an even number of braids for a mare, odd number for a gelding. Just something I latched on to when I read Grooming to Win about 15 years ago. Anyway, english horses' manes should be on the right, western horses' on the left. Another thing I've held on to from the same book. I can't let it go, so I had to train Penn's mane over to the right.

Alright, so how do you take these braids out without wanting to shoot yourself in the face?

1. Remember the two loops you did to the right and two you did to the left? Cut those strands at the top of the braid using your seam ripper. Be VERY careful you don't cut the mane.
Post cutting. (I didn't realize this pic was blurry, sorry)
2. Uncurl the braid with a couple tugs. Pull out the thread pieces.
3. Pull the slip knot out (the braid aid comb sometimes helps here).
4. Pull out the braid itself! The braid aid helps here too for super thin and tight braids.
5. Wet down the mane to get the kinks out. Apparently this helps the mane recover from the abuse of being braided and prevents future damage (like what I did to Mikey's mane where it had a permanent crimp and frizz).

This sew in braid is super flexible- it works well for longer manes, thin manes, thick manes. I haven't met a mane that doesn't take it well. Mind you, thick manes make thick braids, however they're all usually even.

What about manes that you could do a running braid? Glad you asked! One of the boarders brought in her very long maned (and thick maned) horse and I asked to borrow him for an experiment. (this one is for you Emma!)


The braid didn't turn out too badly, and this was just me messing with it for 2 min real quick (I had talked to the owner right before she starting tacking up so I wanted to be out of her hair quickly).

Follow the steps I listed above with the following modifications:

I absolutely would not take any more hair than 2 comb widths. This sample braid is 2, and it would have to be less in the middle.
In step 4, do the slipknot, then take the tail of the braid and wrap it around the braid itself. Then put another slipknot over it to help hold the twist in place. I think a longer mane will end up with longer tails (you lose the thickness of the braid towards the end which is no good either).
Do the first set of right and left thread loops like normal, however, when you do the second set of right and left loops, put the needle through the end of the braid again so it folds one more time. This will take some finagling. The first fold up will want to pop out one side of the braid (seen above). You may have to actively push it back in until you get to secure it properly. I was hurrying, so I didn't do as good a job as I should have. You want to squish the second fold enough to encourage the braid to hug the neck. When you get the braid set right, use step 13's stab straight down to hold the first fold inside the second fold.
A secret to working with long manes is to try and leave a gap between the tip of the braid and the crest when you do the first pull through. This gives the braid a little extra room to curl into the neck when you do the second fold and pull through. I didn't experiment with that today though. I would fold the tip through a half inch max away from the crest (aka don't push the needle through the crest, put it through a half inch into the braid). It'd be something to try!
Just an idea of the mane I was working with- thick, very long. Also very conditioned and slippery.

If anyone gives this a try (ahem, Emma), let me know how it goes, and post a picture of it! Let me know of any other modifications you make!


Forelocks:
Forelocks can be tricky. This is what I did the last time I braided Penn's forelock. I'll try to describe it since I couldn't get pictures.


  • Get the forelock wet and VERY brushed out. Tangling when taking hairs for the french braid is the biggest problem I have with the forelock.
  • Take two small strands from the poll area, cross them over.
  • If you cross right over left like I do, take a small section (1cm down or less) from the left side of the forelock, and not the whole width of the forelock. Treat this piece like your third strand.
  • French braid like normal, never taking more than 1cm at a time and when you bring in a new piece, give it a twist so it covers the old strand completely. This really gives it the nice look. Make sure every piece you take is perfectly smooth as you lay it down- NO BUMPS OR PULLS! Don't neglect the tightness of the braid either!
  • Braid down to the end and slip knot it like you did for the mane. Maintain the tight braid as you near the bottom of the french braid and into the regular braid (this is key because we're not coming back to wrap anything around it).
  • Take your needle and carefully push it up from the bottom of the french braid through to the top where your original two strands came from.
  • Very gently pull the tail of the braid up underneath the french braid. Pull it up as far as you can- the more braid you can get under the french braid, the better and more secure your braid will be.
  • Now that your thread and needle are on top near the poll, go down a twist/strand/fold in the french braid and between strands, insert the needle horizontally through the entire braid from right to left (so it goes in the right side and out the left side). Do not split any strands!
  • Now that your thread is out the left side, push the needle back through the braid and down out the bottom of the french braid. Feel free to attempt to stab the regular braid part on your way back down.
  • Cut off the thread and you're done!


Trouble shooting:
  • Don't feel like you have to strictly keep to the comb width you choose- only perfectly pulled manes that are the exact same thickness and length from bridle path to whither will handle that. Use the comb as a starting width- if the hair is thinner, take an extra tooth or two more hair. If the hair is thicker, take a tooth or two less hair. You want the braids to be the same size at the end of the day. If they're exactly the same width apart, that's just a fantastic bonus. Of course do it within reason- you don't want the braids ending up 3-4" apart at the base of the neck because your horse has rubbed out his mane in a spot!
  • Always encourage braids to lay flat by never pulling them straight out from the neck.
  • Braid as tightly as you can. Loose braids flop and fall out. Tight braids hug the neck!
  • I bought this mesh sleazy from Chick's Saddlery. I braid the night before, pop this on, and it helps to encourage loose hairs to flatten and keeps the braids firmly pushed against the neck. It's also cooler than regular sleazies since it's mesh. I got Penn the medium- and it fits him well everywhere except his jaw and nose. He's cob sized, but his jaw is horse sized... and his nose is petite... I ended up sewing in a couple darts so the nose didn't gap so much. There is a better fitting (and more expensive) mesh hood out there, but it only came in white and the poop stains don't wash out.
If you have any questions, ask! If my response gets too long, I'll do some edits below this line in the post. Let me know if you try these braids!